1. Update the billing dates in the Dues Invoicing IQAs.
There are three IQAs, one associated with each email above: Dues Invoicing_InitialInvoice, _FirstReminder, _SecondReminder. The are located in the Marketing module > Communication templates > Communications > Queries:
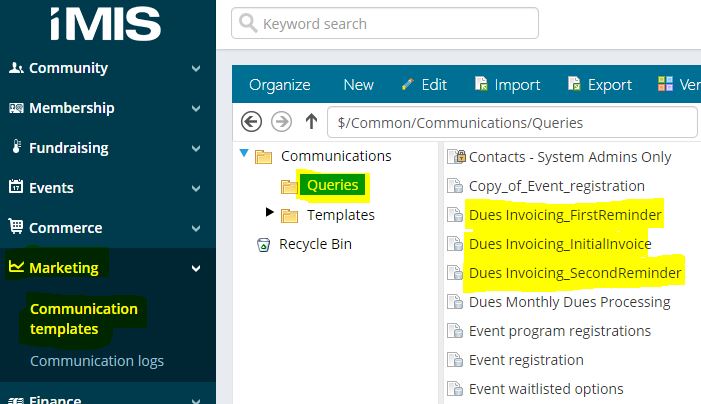
a. Select an IQA and then click the Edit button in the top bar.
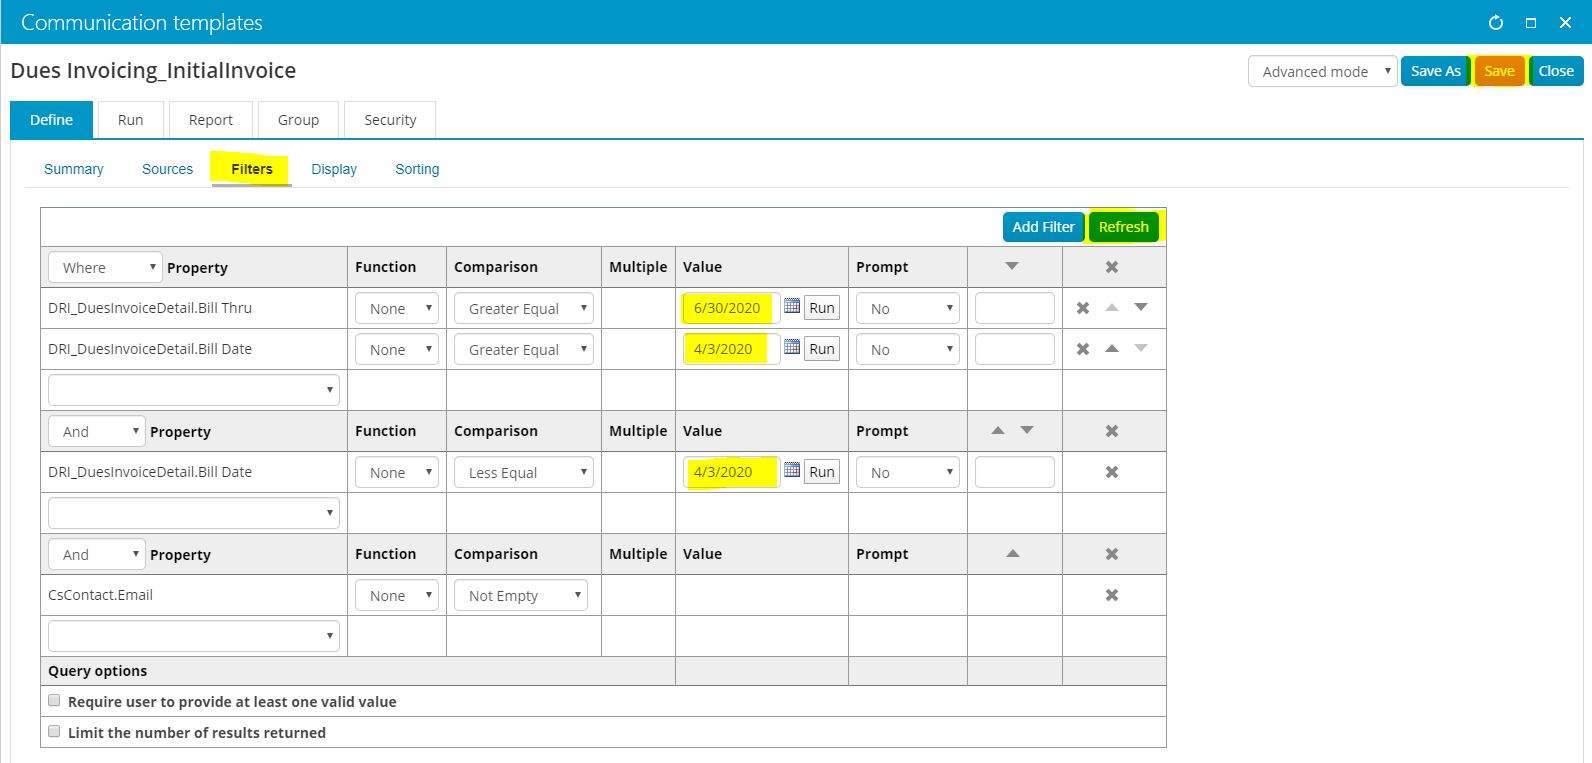
b. Click on Filters and then modify the date parameters. Set the Bill Thru date, set the first Bill Date to the Bill Date range begin date, set the second Bill Date to the Bill Date range end date (they can be the same date); click Refresh; click Save.
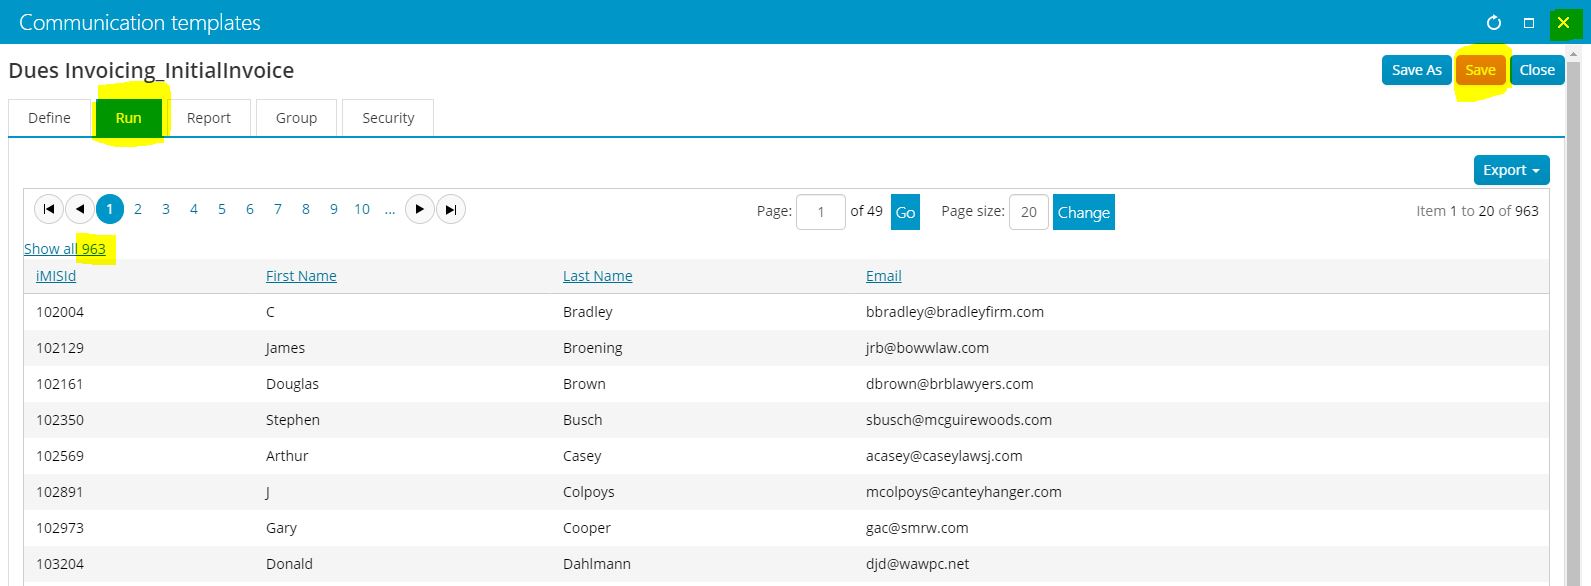
c. Click on Run. Verify that the number of rows returned is reasonable. You can scroll through and review the recipients. Only individuals with email addresses are included.
If you are satisfied with the results, click Save, then close the panel by clicking on the X in the upper right corner.
d. Repeat the process for the other two Dues Invoicing IQAs.
2. Review the Dues Invoice Emails.
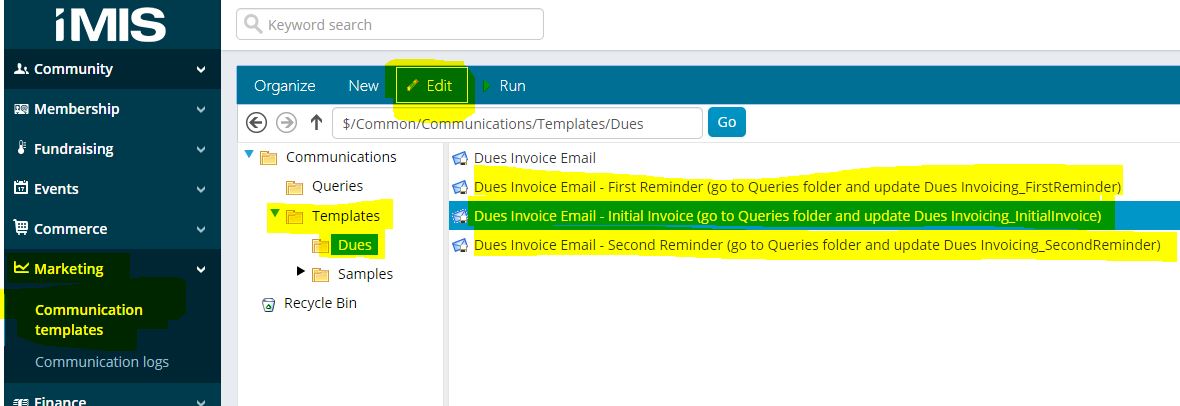
a. Go to the Dues Invoice Emails. There are three dues emails: Initial Invoice, First Reminder, Second Reminder. The email templates are located in the Marketing module > Communication templates > Communications > Templates > Dues. Select an email and click Edit.
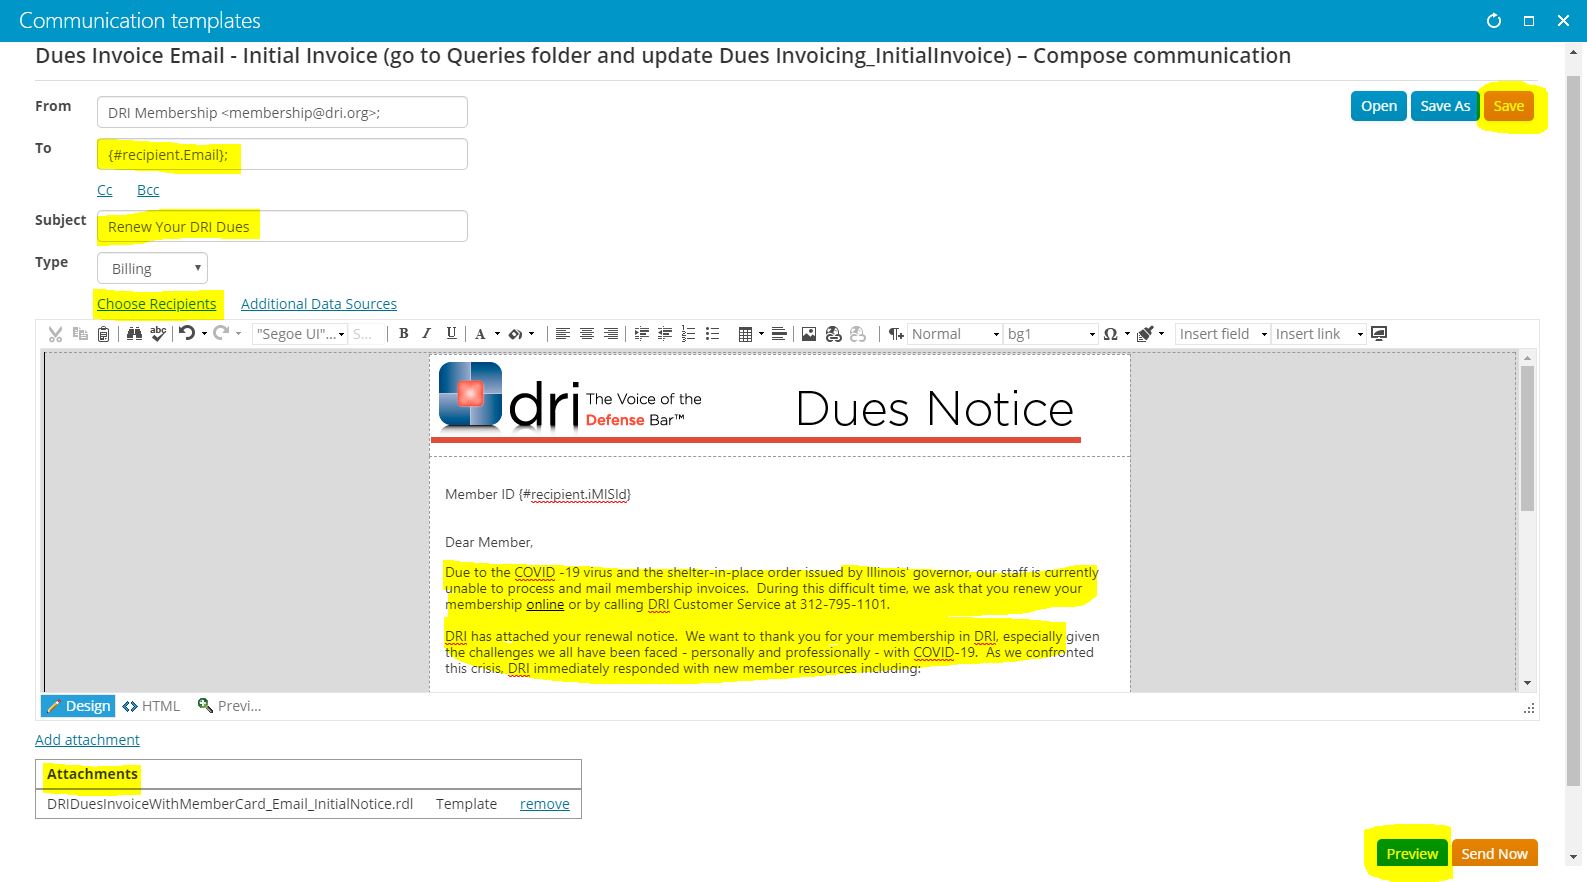
b. Important parts of the email.
- The body of the email can be modified if necessary.
- The To field - special merge code {#recipient.Email}; This field can be hardcoded with your email for testing, but MUST be changed back to {#recipient.Email};
- The Subject field - the Subject that will appear to the recipient for the email
- Choose Recipients - indicates the IQA that pulls all the email recipients (those from Step 1 above) (DO NOT UPDATE)
- Attachments - indicates the dues invoice PDF that will be attached to the mailing (DO NOT UPDATE)
- Save
- Preview - preview what the resulting emails will look like; check the To field to make sure it is pulling in emails as it should; you can only scroll through a limited number of results; you can use the Send All Now button in the preview pane to send all emails.
c. After you have made any and all necessary changes, save your work.
3. Send a test email to yourself.
It is important not to press Save during the testing.
a. Replace {#recipient.Email}; in the To field with your email address followed by a semi-colon

b. Click on Choose Recipients.
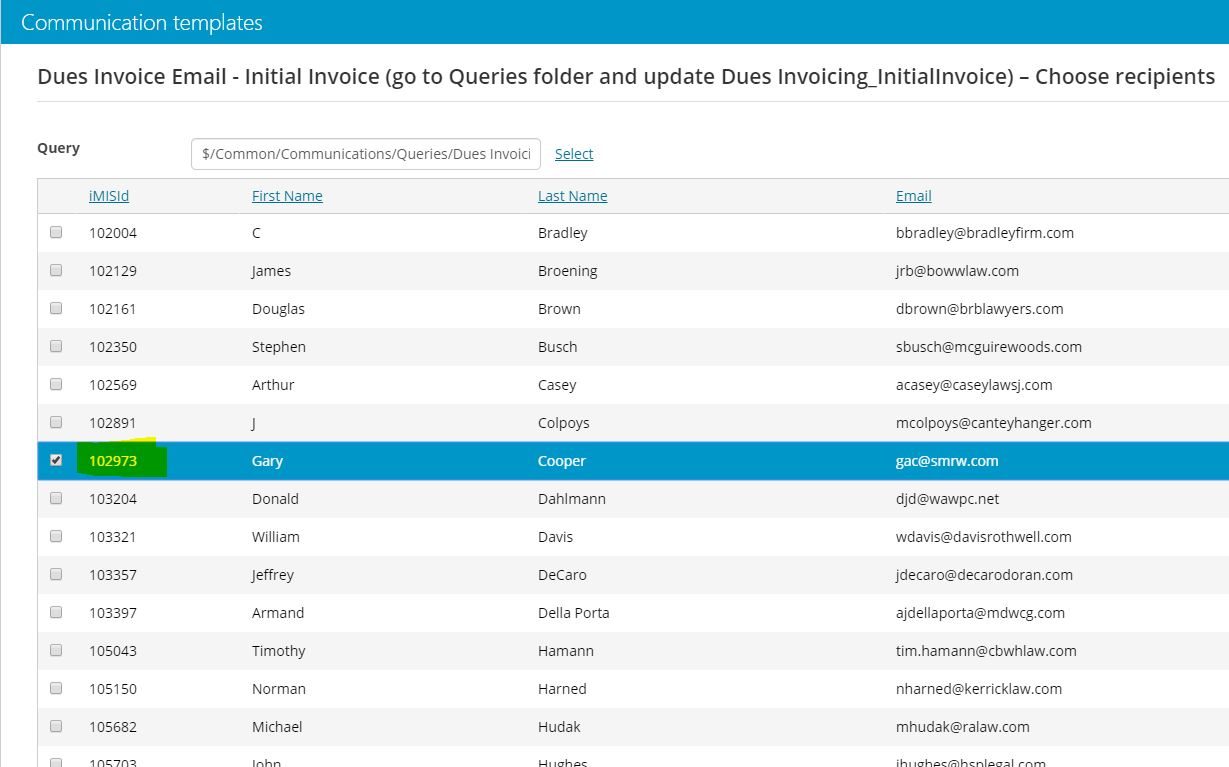
c. Click on Show all xxx in the upper left so that every row is displayed. Then click
on the iMISId of one member in the list, that will select JUST THAT ONE member:
d. Scroll all the way to the bottom of the list and click on Return to Compose in the lower right corner.
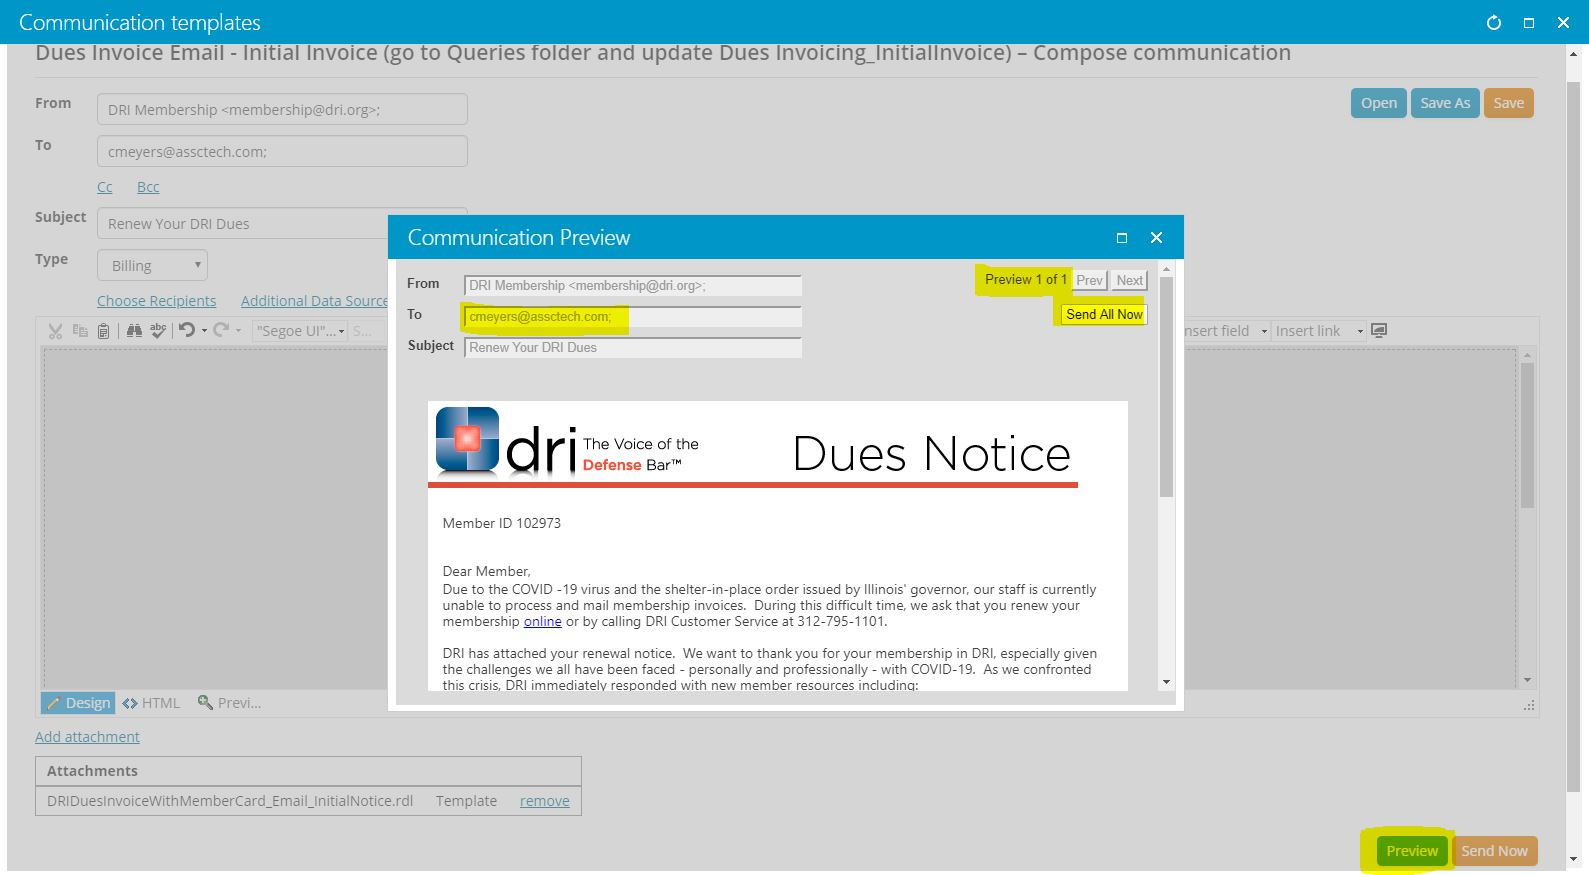
e. When you return to the Communication templates page, click on Preview.
MAKE SURE that the message in the upper right corner indicates Preview 1 of 1 (this is just the one recipient you selected above).
MAKE SURE the To field indicates your email address and not that of a member.
f. Click Send all Now.
g. You will see a dialog box indicating that the emails has been queued for processing... (be patient, this can take a few moments to display a message). Close the dialog box.
h. Close the Communication templates pane WITHOUT SAVING (the To will then revert back to {#recipient.Email}; which is what you want to happen) by clicking on the X in the upper right corner.
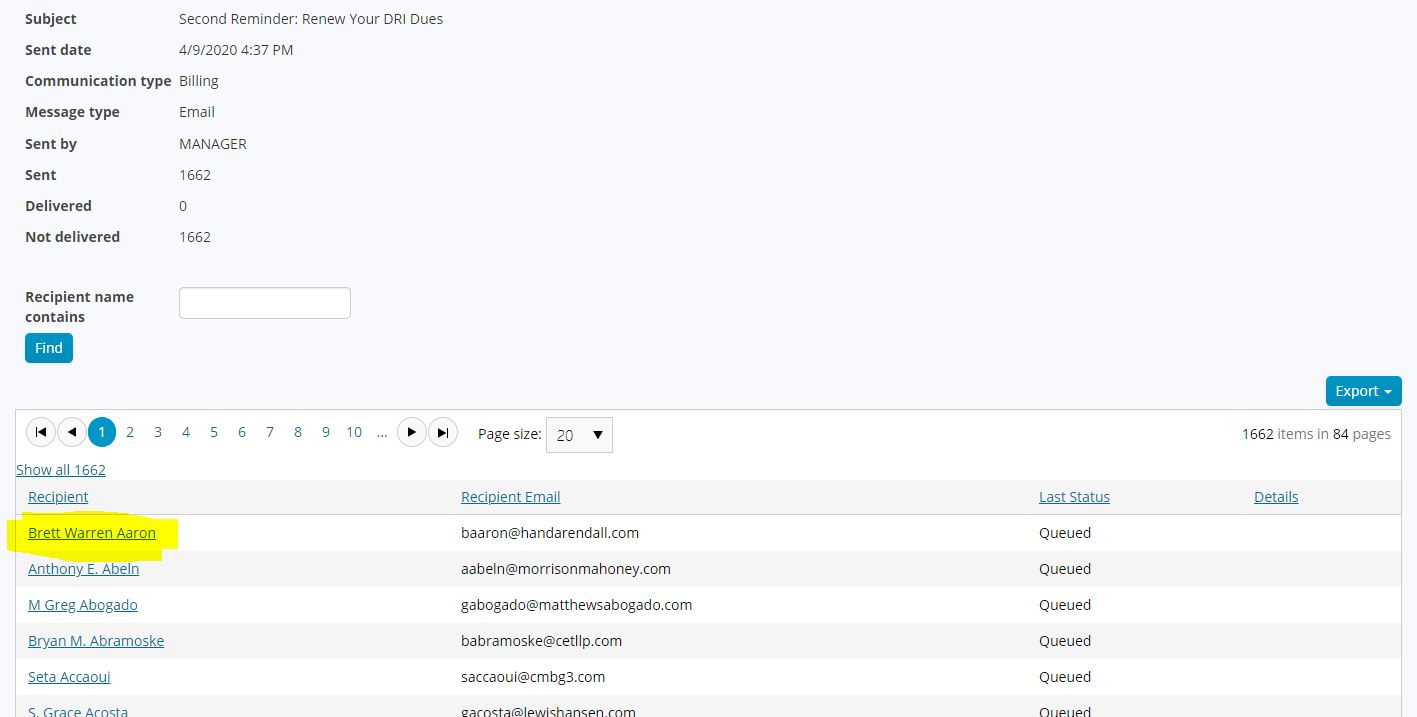
4. Go to the Communication Log to see the email that you just sent (it may say Delivered = 0; ignore that).
 5. Go to your mail Inbox and review the email that was just sent to you.
If all is good, you are ready to send that email.
6. Send the Email to All Recipients
a. Return to the email template you just tested and Edit it.
b. Click Choose Recipients and verify that all are selected; click Return to Compose.
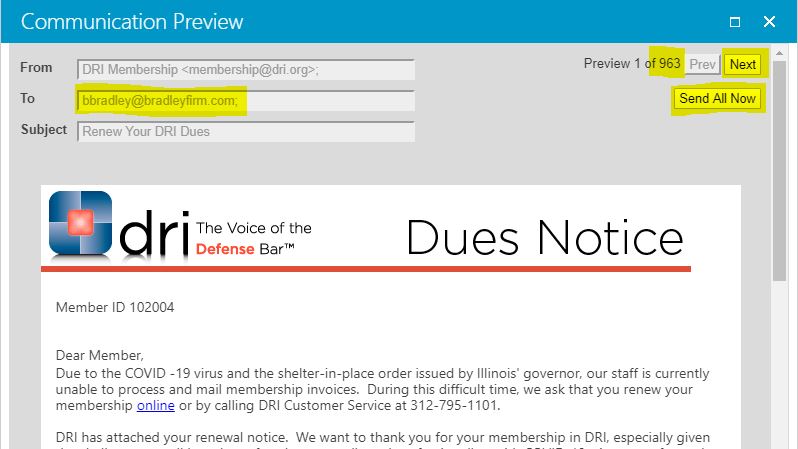
c. Click Preview; the message should now say Preview 1 of xxx where xxx is the total number of recipients.
You can click Next to scroll through a few; make sure the To field changes to a new member with each click of Next.
d. If you are satisfied, click Send All Now from the Preview pane.
 7. You can then return to the Communication log and you will see the Sent number climb as emails are sent out
 (again, the Delivered column may not update).
8. After all emails have sent, you can click on the Subject within the Communication log and you can see all the email recipients. From here you can drill down to their Profile page, click on History and see the specific email that was sent to that member.
Business object, DRI_DueInvoiceDetail, created from view vw_at_IMDuesInvoice_DuesDetail which contains all records from vw_at__IMDuesInvoice combined with the Subscriptions and Product tables for all Bill Thru dates and all Bill Date ranges.